

We love seeds. Outdoors or indoors, seeds are fun. They offer a much more complete tapestry for creativity. A form of mastery (a word we use loosely in gardening terms) becomes possible because there is more freedom to play with different floral varieties – a springtime nursery may not have the inventory you produced. You become the curator of any number of heirloom flower varieties.
At Bear Creek Farm, we are vocal proponents of direct seeding outside (though we fully recognize there are no rules for growing). There are many reasons to begin with the miracle of one small seed deposited directly into the ground - where a flower will eventually grow. We choose direct seeding to the practice of starting indoors, weather, and other conditions permitting.
- Direct seeding allows the plant to take up residence in its intended final home, germinating and growing in a natural setting - and on a timeline that nature itself supports.
- Some seeds, specifically those from native plants absolutely prefer to be planted directly into the ground. Native plant seeds are already adapted to the natural conditions of their environment – a fact that we use to our advantage.
- An overarching benefit of direct seeding is that it involves very little initial investment. So too, is it overall easier to execute - because the need to use indoor planting materials goes away, and there are fewer steps to the growing process. It’s more fluid.
Though we at Bear Creek Farm love direct seeding because of its ease, many seasoned gardeners and beginners alike want to get their hands into dirt earlier than waiting for the season's last frost. For them, starting seeds inside may be preferred when:
- there is a short growing season so getting a head start indoors provides a good option; or
- for plants that are not well-suited to direct seeding - such as those with delicate root systems or too long germination periods.

GETTING STARTED
Decide whether you are focusing on direct seeding or prefer to start the seeds inside. Depending on where you live, you can mix it up. Remember that seeds themselves are a low-cost investment with a potential return that is hard to quantify. How does one measure the beauty that was coaxed so carefully to life?
"INSIDERS" GUIDE TO SEED STARTING
Should you decide to experiment with some indoor planting, we recommend an initial one-time investment that will maximize your chances of success. While a little more expensive at the outset, these one-time investments do provide a higher probability of success in the seeds-to-flower ratio.
We recommend purchase of the following items:
- Grow lights
- Heat mats
- Four or five feet of wooden or metal shelving
- Cell containers
- Flat drainage trays
- Plastic or dome coverings
- Potting or seed starting soil
PLANNING YOUR SPACE
- When you commit to your winter plantings begin by planning your growing space. This space does not need to be huge, but it must be large enough for plants to have the room to grow (and an area to place lamps and other items, as necessary.)
- To create efficient indoor space, we recommend four or five feet of stacked wooden or metal shelving. Many growing lights align to standardized gardening shelf dimensions. (Note that metal shelving is easier to clean if you have any concern about bacteria or pests which live more easily in wood.)
-
Finally, you will need high quality potting soil or seed starting soil. Do not use garden soil. Garden soil can contain damaging pests, diseases, and other misplaced seeds. Ensure that there are no synthetic fertilizers or bark, both of which can burn young plants causing their roots to wither and die. The right soil structure allows some water to drain through while keeping moisture and nutrients the plant needs to thrive. There are many good potting soils, but after much trial and error, we at Bear Creek Farm recommend Pro-Mix with mycorrhizae. When your flowers are fully grown and outdoors, don’t forget to consider our very own fertilizer.
CHOOSE YOUR SEEDS
Having set up, have fun picking your seed packets. (Consider indoor v. outdoor realities when making this selection. For example, easy to grow flowers like sunflowers and cosmos don't really need winter tending; try more unusual varieties.)
- Now a word about seed trays. If you are experimenting with starting flowers inside, tempting though it may be to repurpose found containers around the house (egg cartons, milk boxes, old terracotta pots) - resist. Seed trays create numerous efficiencies which may be overlooked in well-intended efforts to upcycle. However, seed trays make everything more uniform and hasten growth, allowing for standardized drainage, and enable root systems to form well. In sum, they are designed with overall plant growth in mind.
- At Bear Creek Farm, we recommend (both for annual and perennial seeds) the 72-cell and 50-cell flats. Both produce large plants that won’t require (a sometimes-additional step) of interim repotting before transplant into the garden.
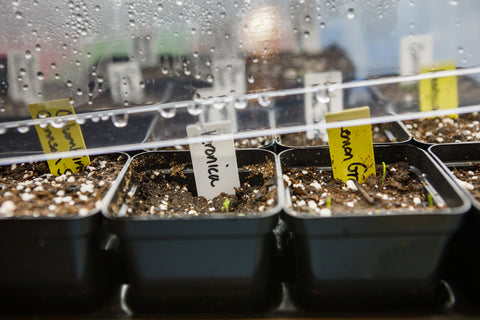
- Make sure to label each tray with the correct species name and the sowing date. This important organizational step will enable you to track the progress of individual seeds and offer the specific care each one requires.
- Before planting the seed, tamp down moistened soil into your containers to eliminate air pockets. Little rootlets don’t like air pockets. In addition, this makes eventual transplant easier and more successful. (Option: Lightly dust the top of the soil with vermiculite, which prevents crust from forming when soil is dry or green algae from forming if too wet.)
- Situate dome lids or plastic covers over the plantings. Position the plastic dome lids or plastic cover of your choice snugly over the trays. Doming drives germination and maintains humidity.
-
Heat mats give consistent results. If you are looking for an alternative (maybe this is just a small-scale experiment), consider placing seeds near sunlight or on top of a warm fridge. Both placements can work but each have downsides. For example, if you enjoy seeding, you’ll outgrow small spaces fast. In addition, you need to ensure that the soil remains relatively warm - roughly 65 degrees or higher.
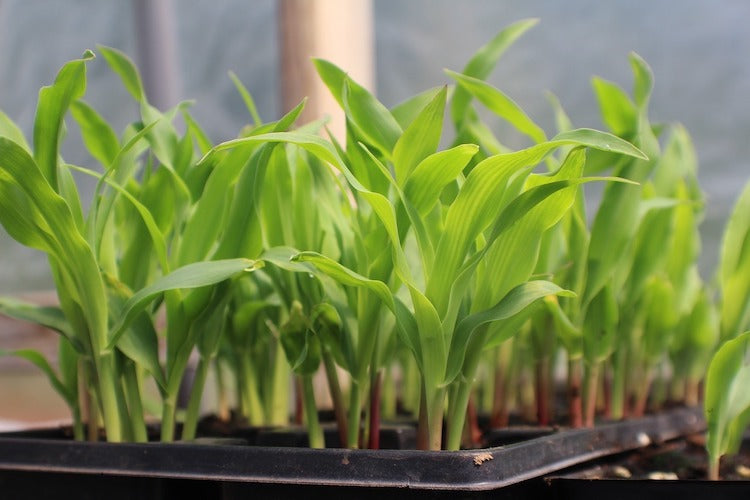
WHEN SEEDLINGS EMERGE
At Bear Creek Farm, we wean seedlings into their new environment. They will need fresh air and maximum light, but they can’t be shocked. Removing domes is delicate.
- Loosening the domes. Loosen and prop up the domes to let air in for a day or two before complete removal. Make sure to keep the cell packs and seedlings nicely moist but not wet.
- We recommend watering the plants “from the bottom” by adding water to the bottom (waterproof) tray. This allows the soil and root system to really drink in the water, feeding the wellspring of the plant.
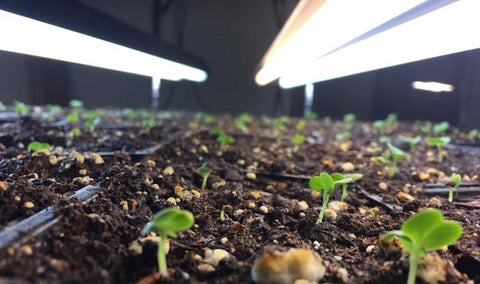
LIGHTING IS CRITICAL
Baby plants need ample light to grow. Be ever-mindful of this – moving the sprouts to a sunny spot - or under lamps inside - is important. Depending on tray placement, it's good to be mindful of light and of soil temperature, always.
- Note that one can use fluorescent lights, which are less expensive, but we at Bear Creek Farm prefer full spectrum lights. These mimic the sun, thereby producing stronger plants. Sprouts have a better chance of survival given the consistency that artificial light provides.
- If you are using lights, suspend them no more than a couple inches above the tallest plant and keep lights on for 14 to 16 hours a day. Bulbs too far away from foliage creates weak stems. We therefore recommend that you keep the lights low and close in proximity to the seed/seedling/sprout, making necessary adjustments in spacing as growth occurs.
-
If you are using regular sunlight be sure to keep moving cell packs to keep stems straight. Seeds reach for the sun, resulting in weak stems that bend, which is the reason to keep moving the cell packs to keep stems straight.

HARDEN OFF BEFORE SENDING OUTSIDE
The process of hardening off is critical before you attempt a big move. Remember, the plants have been in a warm, cozy, and temperature-controlled environment for a long time. Sudden exposure to wind, sun, and variations in temperature can be very stressful. Vulnerable young sprouts in your garden need a few days to get used to a change in their environment. For this reason, ease them in.
- Find a shady spot outside and place them there for a short period of time.
- Then, gradually increase the amount of time in the sun each day.
- At this stage, always bring them back in at night.
- After a week or so, they should be fully acclimated to their new outdoor digs and can be deposited there.
BE REALISTIC
At Bear Creek Farm, we are transparent about our crop failures. We innovate, and in so doing we risk. We encourage you to do the same. Losing some seeds that you have sown indoors or outdoors is normal. It happens to us all. The more often you practice sowing seeds, the greater the chances of your future success. As C.S. Lewis wrote, “Courage, dear heart.” Keep at it.
A NOTE TO GROWERS LOOKING TO CREATE A LARGER OPERATION
For growers who have sown seeds in the past and are experimenting with a larger operation, (perhaps even a small flower farm), we at Bear Creek Farm understand the temptation to start early. However, we do urge that all growers and farmers assess investment from a cost/benefit analysis. As we have been at this for a while now, we offer these pro tips:
- Consider purchasing plugs. It is likely to be more cost-effective to buy plugs from professional outlets rather than attempting a larger indoor early seeding operation. The efficiencies created by purchasing plugs will ultimately save both time and money.
- Weigh the time and money spent on buying materials and preparing the growing medium indoors. Factor in the use of electricity to maintain temperatures, watching and watering on a regular basis versus managing other priorities and necessary tasks in which employees’ time may be better used.
Please note: We are honored and proud to announce that FeedSpot, a blog aggregator with over 250,000 blogs and 120 million readers, named Bear Creek Farm one of the Top 35 Flower Gardening Blogs on the web for 2023.
Now that you've finished reading this article, you should check out our tulip planting primer, dahlia growing guide, and cutting guide for dahlias. And if you're shopping for dahlia tubers, make sure to check out our giant dahlia tubers (10"+ blooms), micro dahlia tubers (under 2" blooms), dark pink dahlia tubers, dark red dahlia tubers, and bicolor dahlia tubers.
Very down to earth info. Nice to know even very experienced growers have some plant losses. I liked the emphasis on what works the best. No squishy advice to cut corners.